CCRMA Studio Guides
Contents
IPL/Studio C User Guide
See the dedicated page here: IPL Studio C User Guide.
AUGUST 2015 USER GUIDES AND INSTRUCTIONS: STUDIO C GUIDES
Studios D and E: Quick Start Guide
AUGUST 2015 GUIDES AND INSTRUCTIONS STUDIO D AND E GUIDES.
Note: Please refer to Studio D/E block diagram for visual representation of studio signal flow.
Studio D and E Macintosh Mixer Setup Tutorial
Macintosh: Getting Started
All audio signals from the Macintosh are initially routed through the Digidesign 002 digital mixer. Thus you will need to use the 002 if you are working with Pro Tools, Logic, Final Cut, Peak, Ableton Live, etc. The faders on the 002 only work with Pro Tools; for all other programs the 002 displays a 'Working...' message and simply passes audio to the Yamaha mixer (discussed below).
Troubleshooting the Mac and 002 mixer
The Mac Pro should be connected to the Digidesign 002 digital mixer via a single firewire cable. Make sure this cable is connected to both the Mac and the 002, or you will receive error messages stating that 'digidesign hardware is not connected'.
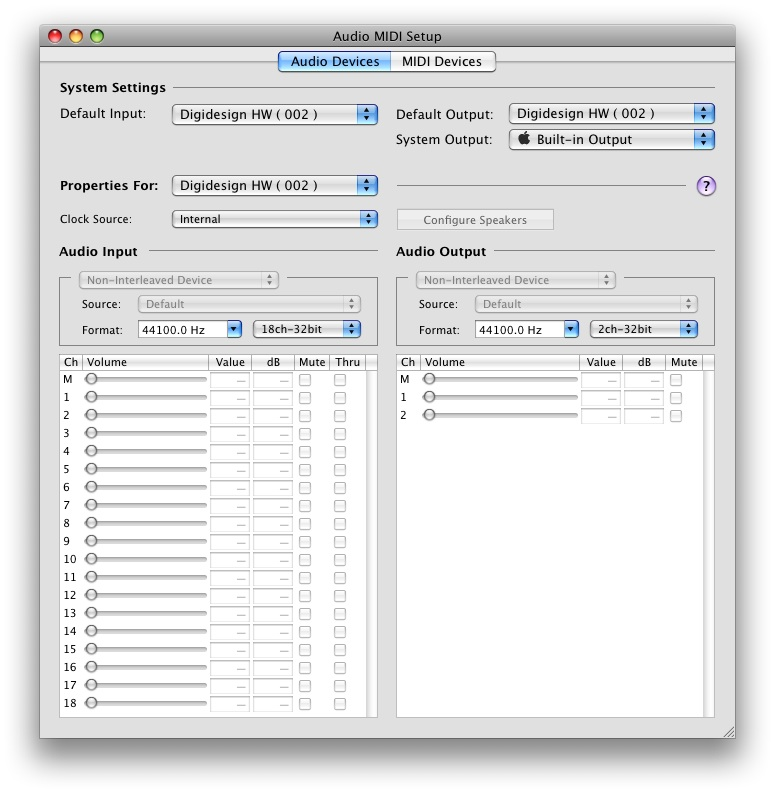
Audio Midi Setup: The Audio Midi Setup (found under 'utilities' on the Mac) allows you to specify the 002 (or any other audio interface connected to the Mac) as the default input/output audio source for the Mac. You may need to remind the Mac to choose the 002, depending on which program you are using, or if you are switching between different audio programs (Itunes to ProTools for example). In this case you would need to quit Itunes before opening ProTools, and you may need to reset the Audio Midi Setup accordingly.
Here's an example of an Audio Midi Setup with the 002 specified as input/output.
- Make sure that the sampling rate within the Audio Midi Setup matches that of the Yamaha mixer.* (see Yamaha mixer section under 'Useful Functions').
Getting Audio Into the Mac
The easiest way to record into the Mac is through the Digidesign 002 mixer. Four microphones and eight line inputs can be plugged directly into the back of the 002 mixer. Inputs 1-8 correspond to inputs 1-8 in Pro Tools, Logic etc.
To see audio signals within your program of choice, make sure you have the correct input selected (input 1 for microphone 1, etc) and that you have record-enabled the track to which you are recording. Apply phantom power to condensor mics using the white button on the rear of the 002. Remember to have the appropriate mic/line button depressed when using a microphone.
Getting Audio Out of the Mac
The 002 mixer acts an interface between the Mac and the Yamaha digital mixing board, which ultimately routes audio to the speakers. The 002 can pass 16 channels of audio (8 analog, 8 digital) to the Yamaha mixer.
The first 8 outputs (corresponding to outputs 1-8 in Pro Tools and Logic) are routed through the analog snake that connects the 002 to the patch bay located beneath the Yamaha mixer.
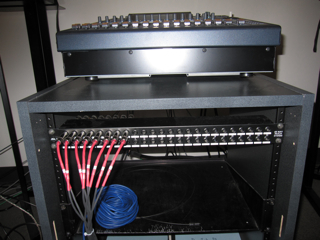
- Make sure this snake is plugged into outputs 1-8 on the rear of the 002 and into inputs 1-8 of the patch bay*. Audio from the snake returns on faders 17-24 of the Yamaha mixer (more on this in the Yamaha mixer section below).
The second 8 outputs (corresponding to outputs 9-16 in Pro Tools and Logic) are routed through the optical cable which connects the optical output of the 002 to the first optical input on the Yamaha mixer. Audio from the optical connection is routed to faders 25-32 of the Yamaha (more on this in the Yamaha mixer section below).
Let's say, for example, that you have 16 channels of audio coming from Logic.. You've routed your outputs in Logic sequentially, the 002 mixer is displaying a 'Working...' message, and now you should see 16 channels of audio returning on faders 17-32 of the Yamaha mixer. Don't see any signals? Skip directly to 'Using Presets' under the Yamaha Mixer Section below.
Linux: Getting Started
8 channels of digital audio can be sent to and from the Linux machine via the Hammerfall DSP interface. The Hammerfall DSP interface is connected to the Linux machine via a firewire cable and to the Yamaha mixer via 2 optical cables. Recording into audio programs such as Ardour and Audacity can be achieved by plugging a mic/line into the Yamaha mixer and establishing the proper routing both within the mixer and within the JACK program in Linux. Audio from Linux is routed to faders 33-40 of the Yamaha digital mixer.
Getting Audio out of the Linux machine using Jack and Ardour
note: All applications can be found under the 'Sound & Video' section of the main Desktop Menu.
To run audio applications in Linux, you must use the JACK Audio Connection Kit (JACK), which is a sound server which provides low latency connections between so-called jackified applications for both audio and Midi data.
1. Open 'HDSPMixer'. This allows you to view signals coming in and out of the Linux machine and initializes the internal mixer of the card. (From command line: 'hdspmixer &')
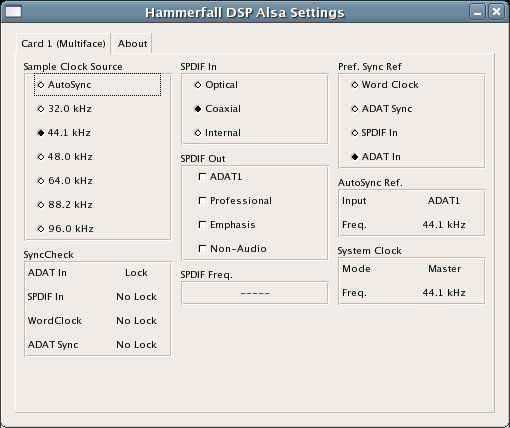
2. Open 'HDSPConf'. (From command line: 'hdspconf &')
- Here you can set sample rate, etc. Set the 'Sample Clock Source' to 'Autosync' . If you are receiving digital distortion on the Yamaha mixer, try toggling between Autosync and your desired sample rate.*
- Set 'Pref. Sync Ref' to either 'Word Clock' or 'ADAT In' (both should read 'Lock' under the 'SyncCheck' box).*
- Be sure the sample rate matches that of the Yamaha mixer. (See Yamaha mixer section below to change sample rate on the mixer).*
3. Open 'Qjackctl' application and 'Start' JACK. (Or from a command line, type: 'qjackctl &')
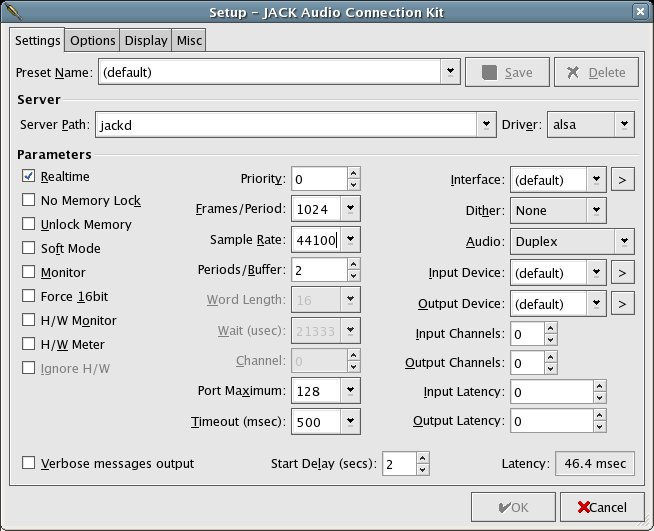
The 'Setup' window looks like:
If this is the first time you use Qjackctl make sure that the Interface field is set to "hw:0" (without the quotes). You can also choose your desired Sample Rate and Frames/Period (buffer size) for playback. For basic audio mixing, 1024 Frames/Period with a Periods/Buffer setting of 2 is recommended. For real-time, interactive use, 128 Frames/Period with a Periods/Buffer setting of 2 is recommended.
4. Open 'Ardour' (or any other audio) program, create a new session or open an existing one.
- (Or from a command line, type: 'ardour2' followed by the name of an existing session, or to specify the path of a new session, type: 'ardour --new /user/...')*
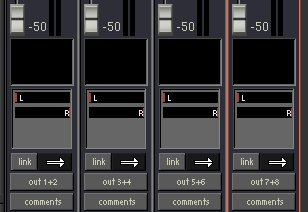
- In the Mixer Window ('Windows'--->'Mixer'), choose your outputs (located beneath the sliders). Choosing an output will create a corresponding connection in the 'connect' window of Jack. (For more advanced methods of Jack routing, see http://ccrma.stanford.edu/groups/soundwire/software/jmess/).*
- In the following example, there are four stereo tracks routed to four stereo outputs (out 1+2, out 3+4, etc). You can also route 8 (or more) mono audio tracks to mono outputs 1-8.*
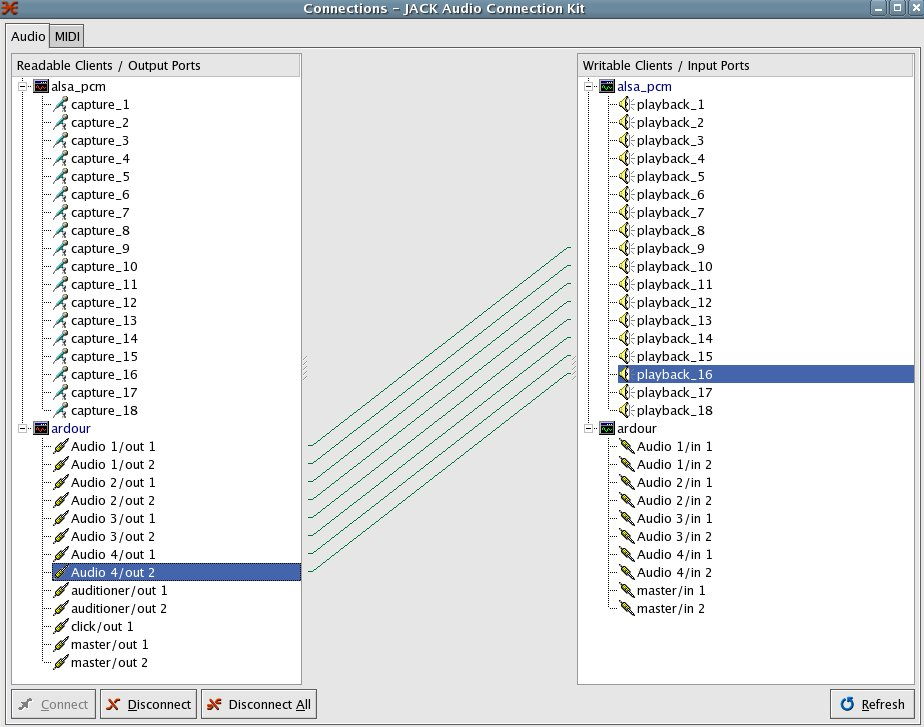
5. Now return to JACK. Pressing 'Connect' will yield a window which looks like this:
Notice that connections from ARDOUR are routed to ALSA_PCM playback 1-8 (NOTE: this is now - Apr 7 2010 - the correct setting, please disregard "6" below).
6. **Now re-route your 'Audio Out' connections from ARDOUR to ALSA_PCM playback 9-16 instead.
- In Studios D and E, you must use capture and playback channels 9-16 rather than 1-8 when playing back or recording. This is due to the fact that the first 8 ins/outs on the Hammerfall interface are analog and the second 8 ins/outs are digital. Currently we are only using the digital connection to the board, thus please use ins/outs 9-16. If you need 16 channels you can use the analog snake, but you will have to modify your own input patch. If you need help with this please email sandyg@ccrma.stanford.edu.*
For 8-channel playback, your 'Connect' window should look something like:
Getting Sound into the Linux machine using Jack and Ardour
1. To record into Linux, connect 'capture 1-8' on the left side of the JACK Connect window (see above) to the Audio ins on the right side of the window. Record-enable the appropriate tracks in Ardour.
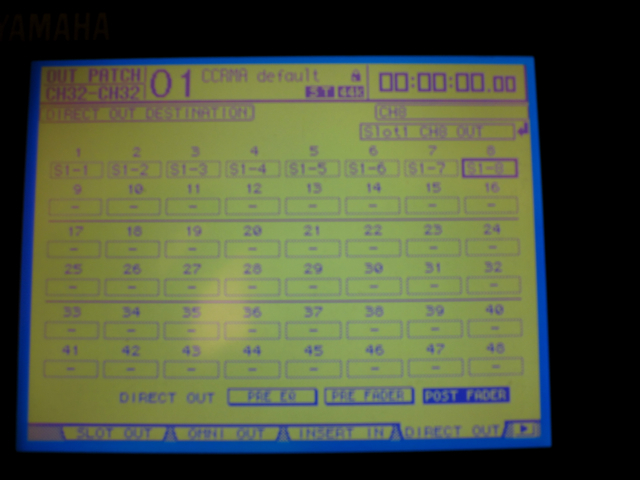
2. Plug a microphone or line into inputs 1-8 of the Yamaha mixer. 'Capture 1-8' corresponds to microphone inputs 1-8 on the Yamaha mixer, provided you are using the 'LINUX RECORD' preset on the mixer (see below). In the 'Output Patch' menu make sure the 'Direct Out Destination' for 1-8 is assigned to S1-9 through S1-16 (this is not a typo, you have to use 9 through 16 in the mixer).
3. Set your gain using the gain knob and apply phantom power if necessary. Note that the fader must be up for signal to pass to the computer. Make sure the 'direct' button located under the 'routing' section of the board is enabled.
Yamaha DM-1000 Digital Mixer
Interface
Navigating the interface
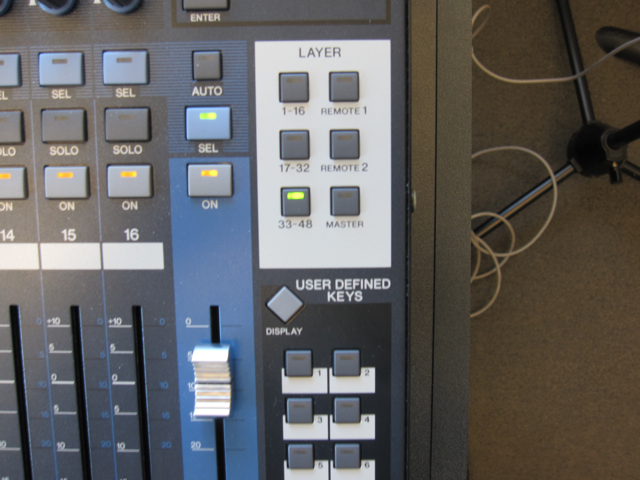
The Yamaha DM-1000 Digital Mixer is divided into different layers of faders:
Default configuration for Studios D and E is as follows (please see block diagram in Studio D/E for visual representation):
(first layer of faders): Faders 1-8: microphone inputs/Faders 9-16: effects returns
(second layer): Faders 17-24: analog ins from Mac/Faders 25-32: digital ins from Mac
(third layer): Faders 33-40: digital ins from Linux
The speakers are connected to Bus 1-8, which can be found on the 'Master' layer of faders.
Useful Functions
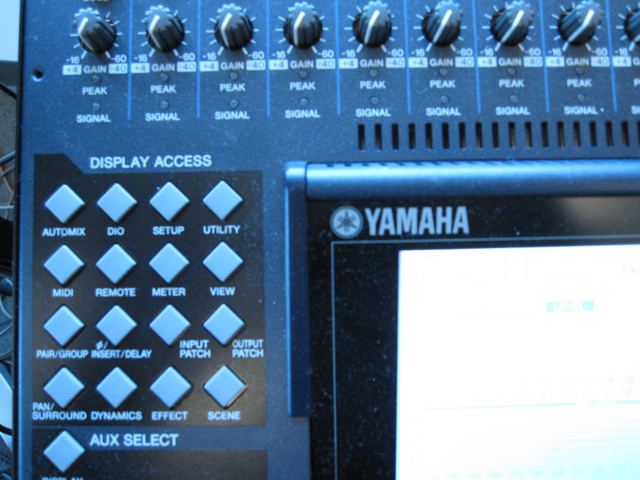
Diamond-shaped buttons allow you to navigate different display screens. Each time you press the button a different menu screen will be diplayed. A few useful buttons are:
'METER': allows you to view input signals across the mixer
'DIO': allows you to change sampling rate.
'SCENE': allows you to store and recall presets
'INPUT/OUTPUT PATCH': allows you to determine where signals flow to and from.
Using Presets
Using Presets
WARNING: PLEASE DO NOT WRITE OVER ANY OF THE EXISTING PRESETS OR THEIR CORRESPONDING INPUT/OUTPUT PATCHES. Unfortunately, it is easy to hit 'Store' or 'Erase' rather than 'Recall' when recalling a preset from the library. While presets can be locked, the input/output patches to which they refer cannot.
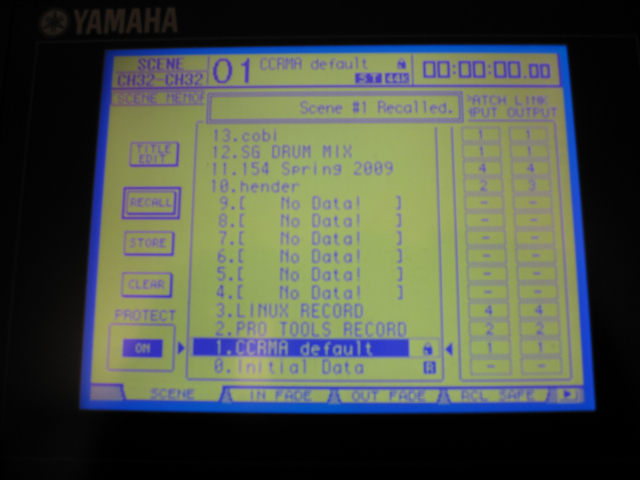
The easiest way to begin using the Yamaha mixer is by recalling one of the 'scene' presets that has been provided for you. There are 3 presets, all of which can be found by pressing the diamond-shaped 'scene' button located to the left of the display screen on the mixer:
  1.CCRMA DEFAULT
  2.PRO TOOLS RECORD
  3.LINUX RECORD
Scroll through the presets using the toggle wheel, and 'recall' or 'store' a scene using the arrow and enter keys.
A message will flash when you have successfully recalled the preset:
These presets have been configured so that all you need to do is raise the appropriate faders to hear sound. Feel free to create your own customized preset but please do not save over any of the presets. Your fellow users will thank you, as will the staff.
CCRMA DEFAULT can be used for audio playback. Routing is as follows (please see block diagram in Studio D/E for visual representation):
(first layer of faders): Faders 1-8: microphone inputs/Faders 9-16: effects returns
(second layer): Faders 17-24: analog ins from Mac/Faders 25-32: digital ins from Mac
(third layer): Faders 33-40: digital ins from Linux
Please note that CCRMA DEFAULT configures the mixer so that the first layer is for mic inputs, the second layer for Mac playback, and the third layer for Linux playback.
PRO TOOLS RECORD and LINUX RECORD retain the same configuration as CCRMA DEFAULT, except that mic/line inputs 1-8 are sent to the Mac or Linux machine respectively. You will definitely want to use LINUX RECORD for recording into Linux but remember that with the Mac you can plug directly into the Digidesign 002 mixer.
Inserting effects
For example, here is how to add a simple reverb to a microphone connected to channel 1 of the mixer:
1. Press the "Effect" button once; you will be in the FX1 EDIT page. Usually a reverb is the default effect there.
2. Select "Patch" and hit enter;
3. Select Inserts as input and output (INS CH1 should be on both sides of the effect, in and out);
4. Press the "Insert/Delay" button;
5. Turn ON the Insert (the OUT and IN boxes should read FX1-1 already);
6. Voilà!
You can now go back to "Effect" page to adjust reverb parameters.
NOTE: THESE SETTINGS ARE NOT AUTOMATICALLY SAVED WITH YOUR PRESET. IN ORDER TO DO THAT, YOU MUST CREATE A NEW 'INPUT PATCH' TO SAVE THESE INSERT CHOICES, AND ASSIGN THAT INPUT PATCH TO YOUR PRESET.
Getting Sound to the Speakers
Audio can be assigned to any combination of the 8 speakers in the studio by doing the following:
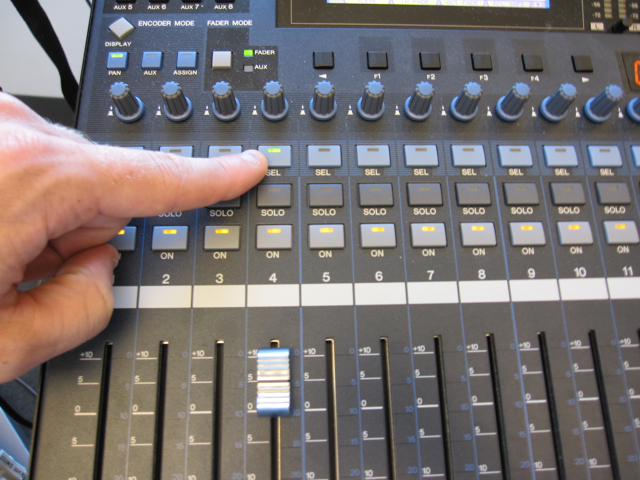
1. Select the appropriate fader by either touching it (the faders are touch-sensitive) or by pressing the blue 'SEL' button located above the fader. Make sure volume is down.
2. Using the 'Routing' section of the mixer (located to the right of the display screen), assign the selected fader to the speakers using the numbered buttons. Button 1 corresponds to the front left speaker, button 2 to the front right speaker. Button 3 is the speaker directly to your left, button 4 directly to your right, and so on, with 7 and 8 being the rearmost left and right speakers, respectively. (Note that default speaker configuration in Studios D and E are 4 stereo pairs of speakers moving from the front of the room to the back).
3. Now bring up your faders. View levels by pressing the 'Meter' button located to the left of the display screen.
Troubleshooting FAQ's
- I'm trying to record into Linux...I've plugged in my mic and I see signal on the mixer but there's no signal in Linux. What should I do?*
On the mixer:
Make sure the 'Direct' button located under 'Routing' section is pressed down.
Make sure the appropriate fader is up.
Make sure your 'Direct Out Destination' under the 'Output Patch' menu is routed to S1-9 through S1-16.
In Linux:
Make sure JACK routing is correct. Any signals coming in and out of the Linux machine will show up in HDSPmixer so be sure to use this tool to troubleshoot signal flow.
- I've got headphones plugged into the board but can't hear anything...*
-Select the fader you want to hear, then press the 'Stereo' button located under the 'Routing' section of the board. Make sure the master Stereo fader is up.
- My levels look alright, my faders are up, but i still can't hear anything...*
-Make sure you are on the correct bank of faders. If yes, then check the 'Master' fader layer and make sure that the faders for Bus 1-8 are up. These are your master speaker volumes, and they may have been turned down.
Input/Output Patches:
This is the bread and butter of the digital mixer, where the important and often confusing routing happens. The presets actually recall fixed input and output patches so that in theory you won't have to re-route anything. However, by understanding the Input/Output Patches, you will be able to thoroughly troubleshoot the mixer.
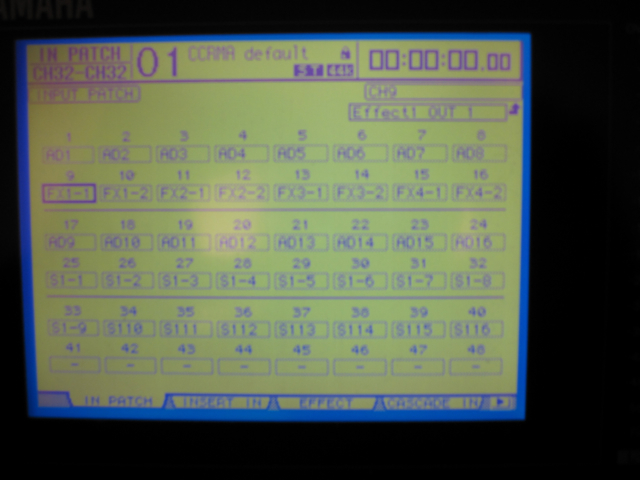
Let's take a look at the CCRMA DEFAULT preset:
Notice that 1-8 are assigned to 'AD1' through 'AD8'. These are the first 8 mic/line inputs. So now if we plug a mic into channel 1 and turn up our gain knob, we should see a level on our 'METER' screen. We can assign this signal to any of the 8 speakers by pressing the numbered buttons in the 'ROUTING' section located to the right of the display screen. So now we can see and hear our signal. But where is this signal going?
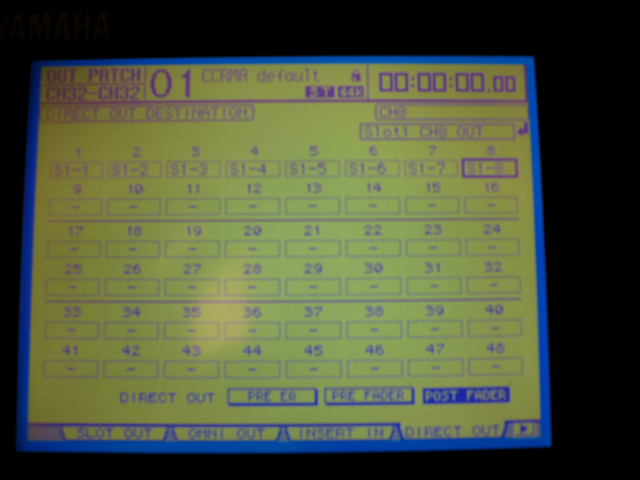
To determine where our signal on channel 1 is being routed, we must now look at our OUTPUT PATCH:
Notice that our 'Direct Out Destination' for channel 1 is 'S1-1' or 'Slot 1-1'. This means the signal is being sent to the first output of the ADAT cable, which is plugged into Slot 1 of the Yamaha mixer. 'Slot 1-1' corresponds to the first mic/line input 1 on the Mac. 'Slot 1-9' corresponds to mic/line input 1 in Linux. Thus, in the LINUX RECORD preset scene, the Direct Out Destinations for 1-8 are Slot 9-16 rather than Slot 1-8.
Let's now go back to our INPUT PATCH:
Notice that 17-24 are assigned to AD9 through AD16, which are the analog returns from the patch bay located beneath the mixer. These will be the first 8 outputs from the Mac. The second 8 outputs from the Mac are routed digitally through Slot 1-8 to channels 25-32. Thus faders 17-32 will control 16 sequential outputs from the Mac.
Faders 33-40 are assigned to Slot 1-9 through Slot 1-16, which are the digital inputs from Linux. Thus Linux audio playback happens on faders 33-40.
By understanding the routing within these patches you can create your own customized input and output patches. To create your own scene you must first create your own input and output patches (or use a preset as a template). Save these patches within their respective libraries, then create a scene which links to and recalls these two patches. Please do not alter the preset INPUT/OUTPUT PATCHES because unfortunately these cannot be write-protected.
