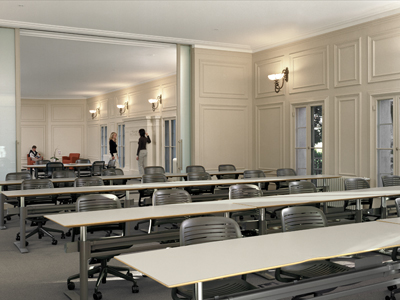
The CCRMA Classroom (Knoll 217) is our main teaching space.
2006 photo of CCRMA Classroom by Ge
Wang
In the front (not shown in the photo) is a projection screen, white
board, pair of loudspeakers (Mackie
HR824), and presenters’ desk.
The audience/students sit in rows of desks with convenient power
outlets.
Projector
An LG GRU510N 4K laser projector is mounted to the ceiling.
Audiovisual Selection
Use the Kramer system to plug in
and choose one video source.
Use the mixer to mix the audio (including
stereo from the selected HDMI source).
Audio System
Actually it’s now an Allen & Heath CQ-12T; maybe you want to
download their CQ MixPad app (under “Software Downloads”) at the manufacturer’s
resources page.
XXX update all references to Mackie 1202; include new images showing
the mixer and its UI…
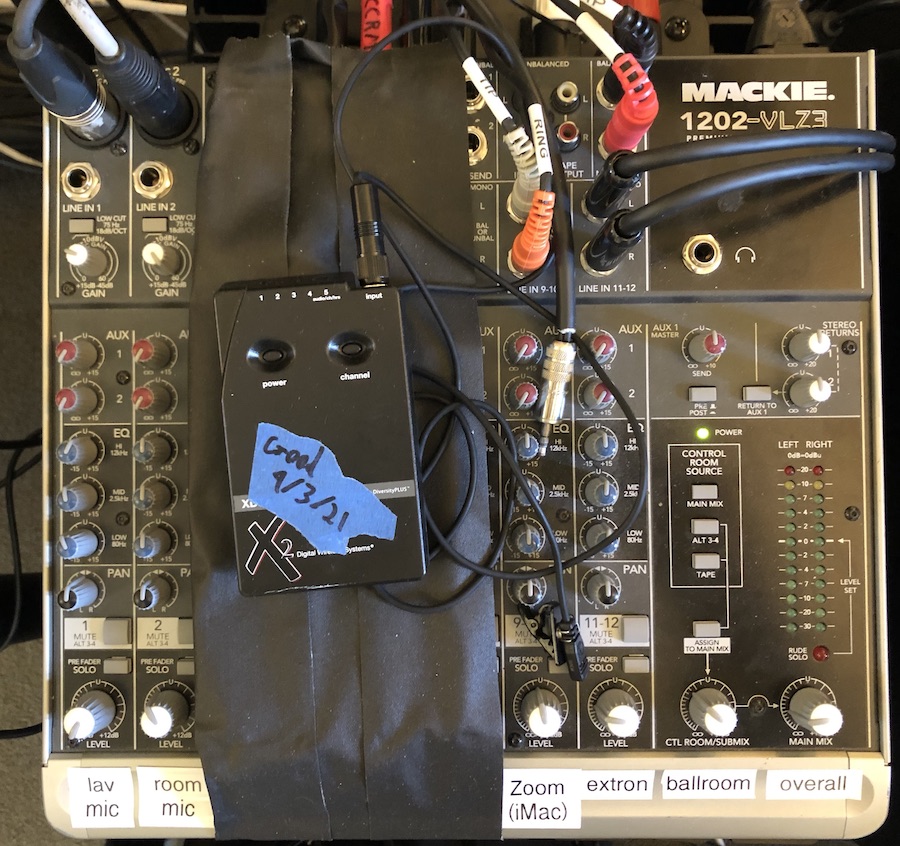
The heart of the Classroom’s audio system is this Mackie 1202-VLZ3
mixer:
Photograph of the Mackie 1202 audio mixer
with labeled inputs and ouputs.
The Mackie’s Alt 3/4 output feeds Zoom; therefore pressing “mute” on
a channel actually means “Zoom only”. To completely eliminate a sound
source, turn the gain knob fully counterclockwise.
Audio Inputs
lav mic
Wireless lavalier microphone for presenter
room mic
PZM mic affixed to the ceiling of the room that does a decent job of
carrying the sound of people in the room
analog
From the dangling stereo audio cable with a 1/8 inch (aka 3.5mm) TRS
unbalanced analog stereo connector, meant to plug into the headphone
jack of a laptop, phone, etc.).
HDMI
Stereo audio decoded from the Kramer’s one selected video source.
sound from the Mac mini dedicated to running
Zoom, straight from its headphone jack in 1/8” stereo unbalanced analog.
Audio Outputs
We use almost all (!) of the Mackie’s audio outputs (not including
inserts), namely (in stereo pairs):
“MAIN” (XLR on back)
Classroom overhead stereo loudspeakers; controlled by “overall” /
MAIN MIX knob.
“MAIN OUT” (1/4” on top)
[not currently used]
“AUX SEND 1/2” (1/4” on top)
To Mic 2 of the “Drum
Machine”; “left” channel (aka #1) unfortunately controlled by “SEND”
knob of “AUX 1 MASTER”, which should be left at “U” (for “unity
gain”)
“CONTROL ROOM” (1/4” on back)
To the Ballroom Adam stereo speakers, via an “Alto Professional Stealth
Pro 2-Channel Wireless Audio System for Active Loudspeakers” (manufacturer’s
page) (so that no speaker cables will be in the way of shutting the
door between Classroom and Ballroom); controlled by
both “overall” / MAIN MIXand “ballroom” / CTL ROOM/SUBMIX.
“ALT OUTPUT” aka “L/3” and “R/4” (1/4” on back)
To Mic 1 of the “Drum
Machine”; controlled by “overall” / MAIN MIX,
consisting only of the channels for which the MUTE aka
ALT 3-4 button is pressed. This is specifically so we can
send the overhead room mic to Zoom without amplifying it in the
Classroom, but it works for lav mics (to make a
perfectly-audible-in-person presenter more clear over Zoom) or any other
“muted” sound sources intended for streaming, recording, live
processing, etc.
Expanded A/V System
Labeled panoramic photo of the
presenter’s desk, January 2022, just days before the demise of the “good
old Extron” (replaced with the Kramer).
Kramer’s selectable HDMI 3 input is now coming from the
Zoom Mac Mini , e.g., so when a person asks a
question over Zoom you can put their face on the big projection screen.
(Also good for video feedback effects.)
Audio from mics, an analog input cable, the Kramer (selected HDMI), and the Zoom Mac mini (so you can hear when people
ask questions over Zoom) go into the audio
system: a Mackie 1202 mixer. The mix drives three sound systems:
Stereo in the Classroom
Mirrored stereo in the Ballroom, if connected (separate gain
control)
The video output of the Kramer is split to produce three
identical mirrored copies sent to:
Projector in the Classroom (via the Kramer’s
built-in HDBT (video-over-Ethernet-cable) output)
Large flat-screen TV in the Ballroom (via output 1
of an OREI 18G HDMI splitter, to an HDMI-over-Ethernet extender
transmitter, to an ethernet jack in the floor of the Classroom under the
presenters’ desk, via the sysadmins’ building-wide Ethernet
patching, up through another jack in the floor of the Ballroom, via one
last Ethernet cable through a conduit you can walk over, to the
HDMI-over-Ethernet extender receiver, and via HDMI to the TV).
The Kramer input to the
video production system (via output 2 of that HDMI
splitter, to the “OUTPUT” HDMI jack on the back of the cart, via an HDMI
cable into input 1 of the “Drum
Machine”)
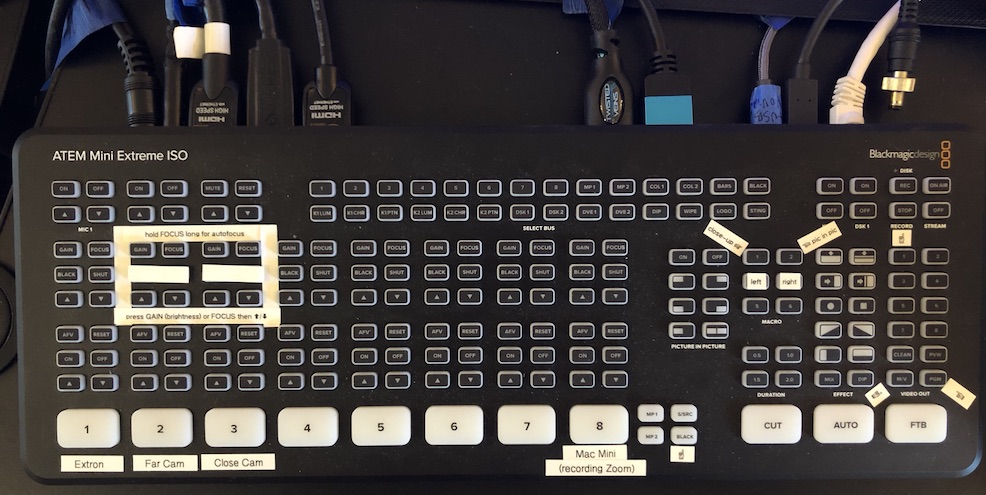
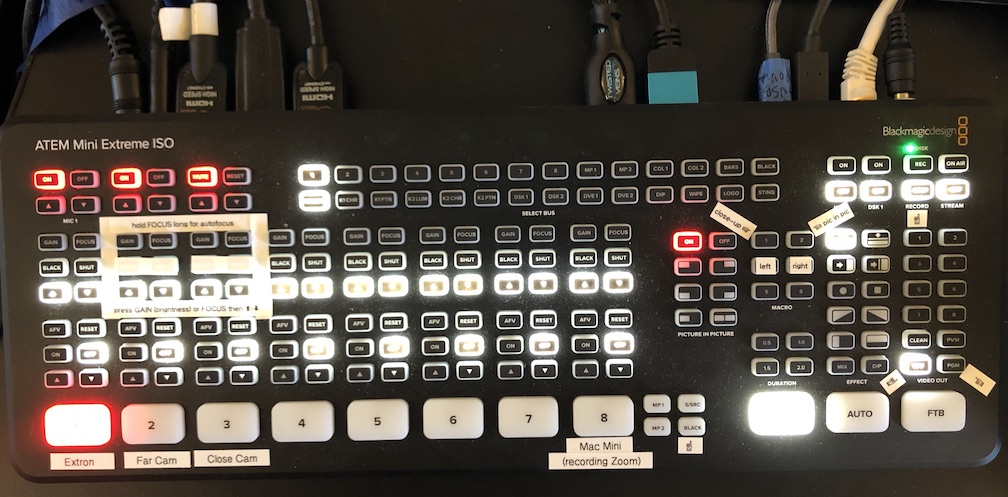
The video production system essentially consists of the video switcher (“Drum Machine”)
Video Switcher
Photograph of ATEM video switcher with
labeled buttons. Note that the power is off because the power input
(upper right corner of photo) is physically unplugged (making it easier
to read the labels in this photo).Photograph of ATEM video switcher with
certain buttons lit up to show the current selections, e.g., video
source #1 “Extron” (now Kramer). The
labels are easier to read in the other photo.
The Blackmagic ATEM video switcher
(“Drum Machine”) is the heart of the video production system. It has
vast capabilities; we use it primarily to select which (combination of)
camera view(s) will be recorded and/or sent to Zoom. From Zoom’s point
of view, this device is the connected webcam (and microphone); whatever
the ATEM is outputting (e.g., your laptop video via the Kramer, with your face superimposed in
a small picture-in-picture rectangle) is “your camera” as far as Zoom
(or any software on the Mac mini) is
concerned.
The “Drum Machine” (because of the light-up touch pads)
Output
It acts a “webcam” and stereo USB “microphone” to the (mainly dedicated
to Zoom) Mac mini
Inputs
Cameras and the split output of the Kramer. Each has a corresponding
labeled and numbered big touch pad for selecting it.
Display
Has its own adjacent small video display monitor.
Best button
Try pressing the M.V button for “multi-view” mode to see
all inputs (including audio metering) on the display.
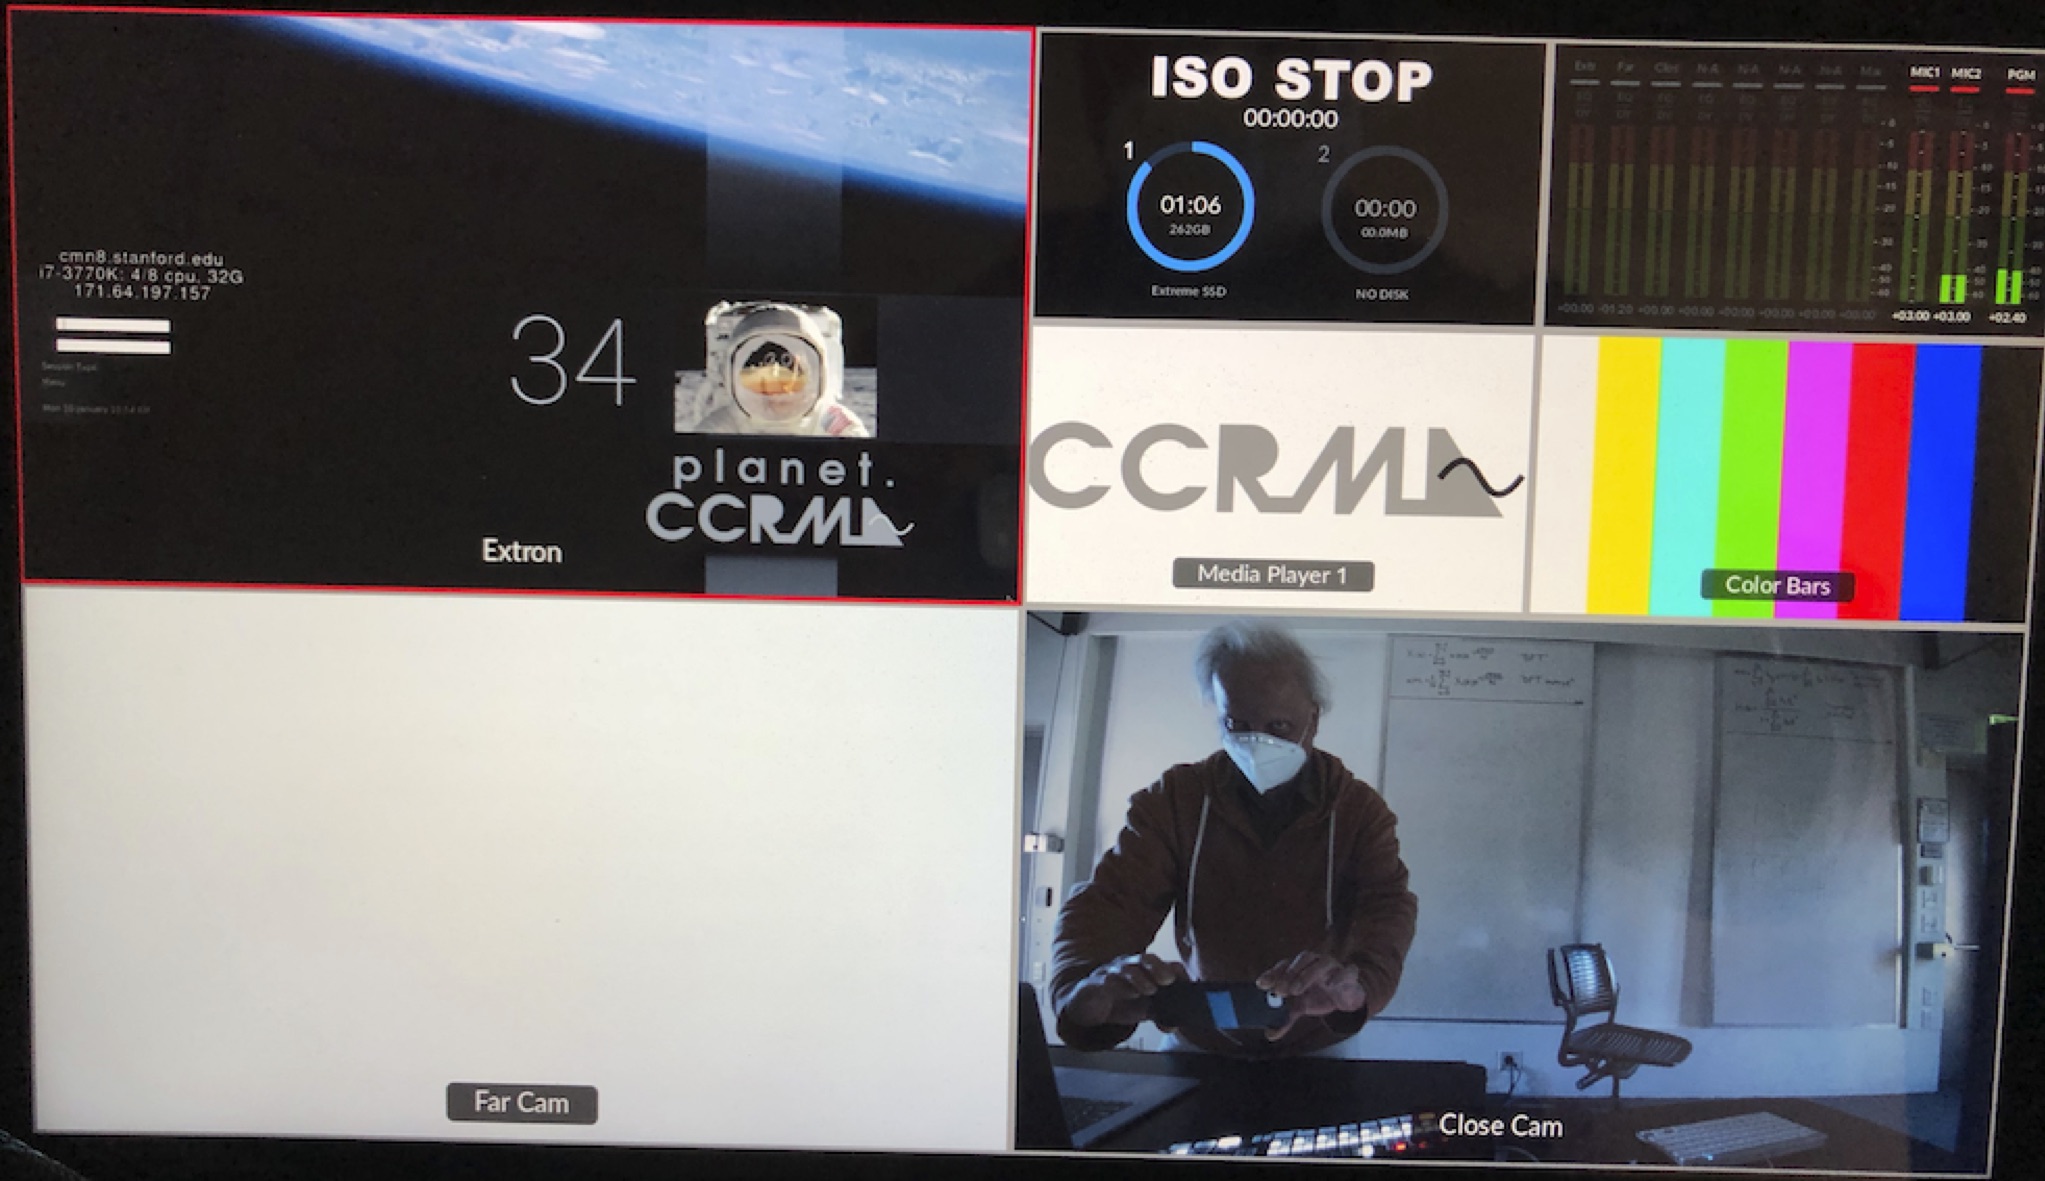
Photograph of ATEM’s video display in its
most useful M.V mode (where you can see that the Far Cam in
its not-very-useful no-lens mode, and that the Kramer (formerly Extron) is set to the
Linux machine)
Mac Mini
There’s nothing too special about this Mac; it’s
just for running Zoom (etc.).
Its video input “webcam” (with stereo digital audio)
is the “Drum Machine” (so you can video
produce your class/lecture/concert/etc. for streaming and/or
recording).
Its video output is split (mirrored) to a “Janus-headed” pair of
identical video monitors, as well as going to the HDMI 3
input of the Kramer (so you can show
Zoom on the projector).
The audio output goes to the audio mixer (so you can hear Zoom in the
loudspeakers).
It doesn’t connect to CCRMA accounts, but you can
easily just log in as “A Zoom User” (with certain restrictions,
such as all files being deleted when you log out). (Otherwise you need a
local account (meaning just for this one computer): ask staff to log in (as admin) and perform
Apple’s usual way of making a “User” in the
Users & Groups pane of
System Preferences.)
Recipe for Hosting a
Presenter on Zoom
Here’s one way to have somebody who is not in the room teach a class
or make a presentation to a live audience in the Classroom.
Turn on both of the Zoom Mac mini’s
video displays, so that people on both sides of the presenter’s desk can
see the Zoom screen.
Power up the projector
Select 3 on the Kramer. The Zoom
Mac mini’s video should now appear on the projector; if not then
debug.
Log into the Zoom Mac mini (preferably with your personal local
account; otherwise “Guest User”)
Make sound on the Zoom Mac mini. It doesn’t matter how: sound file,
website, Zoom, etc. (The Mac mini sound should come out the built-in
headphone jack, not via any HDMI or USB audio the machine might
recognize.)
Turn up the “Zoom” channel on the mixer.
You should hear the Mac mini’s sound; if not then debug.
Decide which local camera to send to Zoom and choose it on the “Drum Machine”. The far camera is nice
because it shows backs of audience heads as well as confirming that the
people in the Classroom are seeing the right content on the projector.
(The camera is good enough that projected content is generally legible
even when seen through the camera.) The near camera can be good too, if
you turn it to face the audience; then the remote projector can see the
faces of the people in the front of the audience.
Make sure that the local room mic is going to Zoom (so the presenter
can hear in-person people asking questions and heckling) by turning it
up on the mixer with the
MUTE/ALT 3-4 button pressed in. It’s wise
to confirm the level by looking at the audio meters on the “Drum Machine” “M/V” view while clapping or
making a sound.
Ideally somebody in person in the Classroom will sit in front of the
Zoom Mac mini to monitor chat, etc.
If/when the current presenter is local, it’s worth
going through everything above, and then just make these few
additions:
Select the local presenter’s computer video on the Kramer, possibly switching the local
projection back and forth between that and the Zoom video on input 3
(like if somebody remote asks an involved question, or when going
between local and remote presenters).
Use a microphone on the local presenter, either lav(alier) or
handheld. The corresponding mute buttons on the mixer determine whether the mic will go to both
zoom and the local loudspeakers (unmuted) or only to zoom (muted),
depending on the local preference. (Skipping this step means using only
the distant room mic: the zoom sound will be distant and reverberant, so
that all but the loudest presenter voices will be inaudible over Zoom
without headphones.)
Make sure the local presenter has computer sound through the mixer; if so then it should automatically go to
Zoom. When playing sound examples, it’s best to use “Original Sound”
type options (because to Zoom these are coming into the “microphone”
that is actually our mixer, not via Zoom
screen sharing with “share sound”). But if remote people are talking
through Zoom through the local loudspeakers, you might want/need to turn
off “Original Sound” to avoid feedback/echo.