CyberBully
Cyber Bully
Micah Arvey
Rooney Pitchford
Zach Saraf
Similar products:
- Atoner 4ms pedals http://www.youtube.com/watch?v=IIwP3_YZEYQ&feature=relmfu
- WMD Geiger Counter http://www.youtube.com/watch?v=4A7VFxIBj84
Similar on Wiki:
- Ipad Fun - https://ccrma.stanford.edu/wiki/File:IMG_2016.jpg
- Guitar Buttons - https://ccrma.stanford.edu/wiki/File:EliotKermit1.jpg
- Rotating Hands - https://ccrma.stanford.edu/wiki/File:ErichPeske3.png
- Filter Glass Sounds - https://ccrma.stanford.edu/wiki/File:Gabriele_Sketch_2.jpg
- Guitar Talkbox -

Pics so far:
5) Three lists:
Minimal viable product:
-
Trackball volume controller
Motion in the ball in a given direction increases or decreases volume
- In x direction, volume is affected permanently (position)
- In y direction, volume is affected temporarily (according to acceleration)
Want to have done by the final deadline
- add delay, distortion, way, flanger
- toggle button to switch through effects
Things to do with unlimited time:
- Get rid of the computer. Make a fully functioning box, pre-programmed effects that cannot be changed
- Add the ability to affect the effect (to alter the parameters of an effect setting rather than the level of the effect)
5b) Elevator Pitch
The Guitar CyberBully effect ball offers a new level of player control to the world of guitar effects pedals. Digital effects alter the signal based on the velocity of the trackball in any direction. In one setting, spinning the ball to the left and right may lower and raise volume, while movement in the vertical direction would distort the signal, only as long as the ball spins. Toggle controls allow for customized sound design across multiple effects settings.
Materials:
- Trackball - maybe not check?
- Arduino
- enclosure
- misc. electronics
Extras:
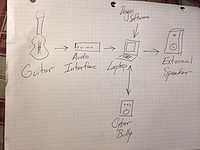
- Digital audio interface
- 1/4" instrument cable
- Laptop/Sound design software
Steps to realize minimal viable product:
- 1. Find the right ball.
- 2. Take apart ball and reassemble with function in mind.
- 3. Design effect programming.
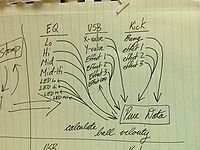
- 4. For construction, we need to know the specifics of our setup. For every button we need that won't be covered by the USB trackball, we will have to program the Arduino to do the job instead.


