Difference between revisions of "CCRMA IPL Studio C User Guide"
(→Making the Software Work) |
|||
| Line 131: | Line 131: | ||
=Troubleshooting Visuals= | =Troubleshooting Visuals= | ||
Screens not working? Go to Preferences => Displays. Click “Gather Displays”. You should get three windows together. Click Arrangement. Make sure “Mirror Displays” is deselected. | Screens not working? Go to Preferences => Displays. Click “Gather Displays”. You should get three windows together. Click Arrangement. Make sure “Mirror Displays” is deselected. | ||
| + | |||
| + | [[Image:Picture_5.jpg]] | ||
If you don’t see three Boxes right near each other, click “display” and click “Detect Displays”. This should resolve any issues. | If you don’t see three Boxes right near each other, click “display” and click “Detect Displays”. This should resolve any issues. | ||
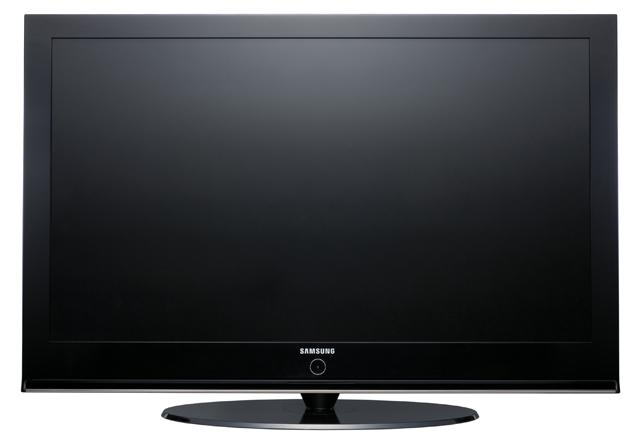
'''Note:''' In particular for video editing, the Samsung needs to be calibrated. Select “Color” on the samsung preferences, and make sure that the preset “samsung calibrated” is selected. Alternatively, you can calibrate your own version...try to make it look as close to the Cinema HD display as possible. | '''Note:''' In particular for video editing, the Samsung needs to be calibrated. Select “Color” on the samsung preferences, and make sure that the preset “samsung calibrated” is selected. Alternatively, you can calibrate your own version...try to make it look as close to the Cinema HD display as possible. | ||
Revision as of 16:21, 10 August 2010
Contents
Studio C: Getting Started
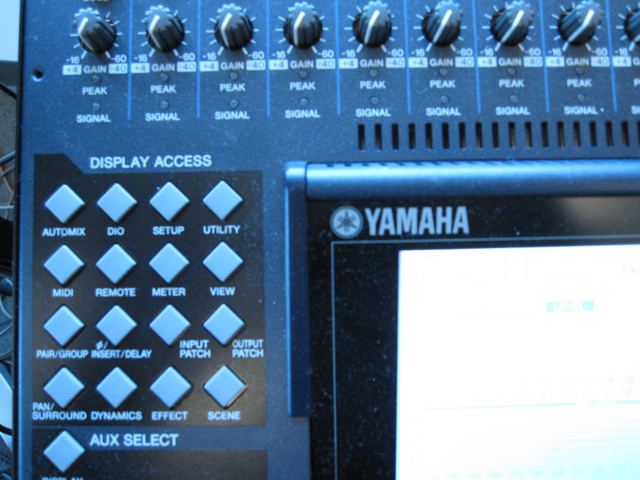
All audio signals from the Macintosh are routed into the the Yamaha DM1000 digital mixer via an optical line out card. You will need to make sure system preferences on the mac are set to the right output, and also that the mixer has the right settings.
Sound
Start by getting any kind of a audio signal playing from the mac (I go with pandora or itunes).
Now Look at the mixer. Try selecting Layer Channels 17-32, and raise the first two channel sliders. If that doesn’t work, read on...
Press the “Scene” Button on the bottom right of the Desplay Access set of buttons. From there make sure that “5 MAC PRO PLAYBACK” is selected. Use the scroll wheel to select this preset, and either press “enter” near the scroll wheel, or “recall” in the “scene memory” section in the bottom right corner near the screen.
Next, Select Layer “17-32”, in the white area on the right side of the mixer near the scroll wheel. Raise channels one and two on the mixer sliders.
You should now be hearing sound. Please refer to “Troubleshooting Sound” if you are not.
Visuals:
The MacPro in Studio C has two displays for your use in addition to the main screen.
To activate the Samsung Flatscreen, use the Remote Control on the desk to power it up. This display is really good for video editing. It should automatically load when powered on. If not, refer to visuals troubleshooting.
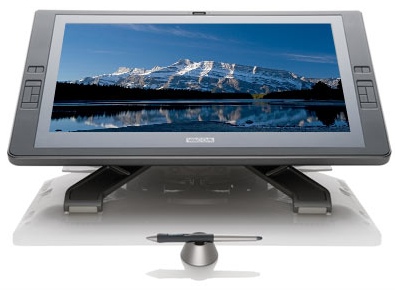
The Wacom Tablet. Power on using the button on top of the screen. This screen Is a touchscreen table for use with the associate pen. This is really useful for repetictive tasks, like drawing patches in isadora. It too should automatically load as a display.
As a default, tapping with the pen is a click, holding the pen to the surface is dragging. The two buttons on the pen act as double click and right-click, recpectively.
To edit functionality for the pen, visit Apple Preferences => “Wacom Tablet”
If either of these are not working, please refer to “Toubleshooting Visuals”.
Make sure to power off the displays before leaving the room.
Note: Sometimes, when the displays are off, the computer will still recognize them as operational, and it will allow the mouse to move thorugh to them. This can result in “losing the mouse”. There is nothing in the bottom left of the main screen, so drag the mouse down and to the left to try to find it again.
Software
The Studio C bundle is different than the rest of CCRMA in that it offers several additional options for video and audio production.
Adobe Suite. Includes: Photoshop, Illustrator, and InDesign (Image and Layout editing tools) Flash (Animation, interactive web) Fireworks, Dreamweaver (Web Design) After Effects. (Special effects, video, animation)
ArtMatic Voyager (3D Rendering and Animation Suite)
Final Cut Studio Includes: Final Cut Pro (Industry standard video editor. Useful for large projects) Motion (State of the art special effects / animation tool) Color (Color and special effect mastering suite for video) DVD Studio Pro Compressor (Easily create batch conversions of video files to any format) Sountrack Pro (Easily link final cut projects for audio mastering/mixing
Isadora (Realtime video processor, utilizing object-oriented programming. Exceptionally stable and very simply and powerful to learn. Fully customizable inputs/outputs)
Logic Pro (Mac’s top of the line audio tracking software)
Max / MSP / Jitter (Realtime audio and video processor, utilizing object-oriented programming. Fully customizable inputs/outputs. Very cool)
MetaSynth (Fully customizable tour through virtual synth land, utilizaing architecture as a way to craft sounds)
Sibelieus (Notation and MIDI Software)
Snaps Pro (Powerful screen capture tool)
Making the Software Work
Final Cut: If final cut is quitting before loading, you need to trash your use preferences. Go to Finder => <<username>> => Library => Preferences
There are 4 files you need to delete: 1) com.apple.FinalCut.plist 2) Final Cut Pro User Data => Final cut prefs, prefs, obj cache, prof cache. Delet all of them.
Empty the trash, and the program should now open. (this has something to do with networked user preferences).
Set Scratch Discs: Make sure to select where you will be writing your captured video and renderings to. File => System Settings.
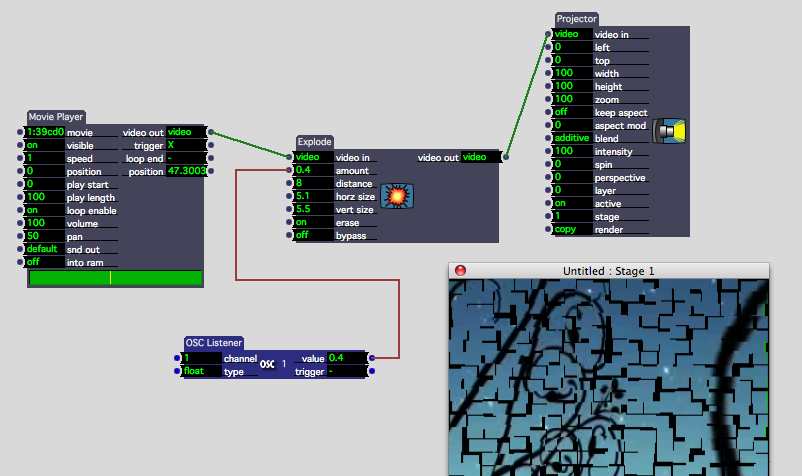
Isadora: Introduce several object on the canvas: Movie player, explode, OSC listener, and projector. Select File => Import media. Select a movie file, set horz size and vert size on the explode object to five.
Select Window => Show Stages.
Now see what happens when you change the value coming out of the osc listener. Imagine the possibilities of realtime video!
Use Policies
Make sure to turn of monitors, log out, and leave the room clean. Users with the room reserved ahead of time have preference to those who do not.
Troubleshooting Sound
Okay, so you're not getting sound yet. Lets get into the nitty gritty.
Start with the Computer:
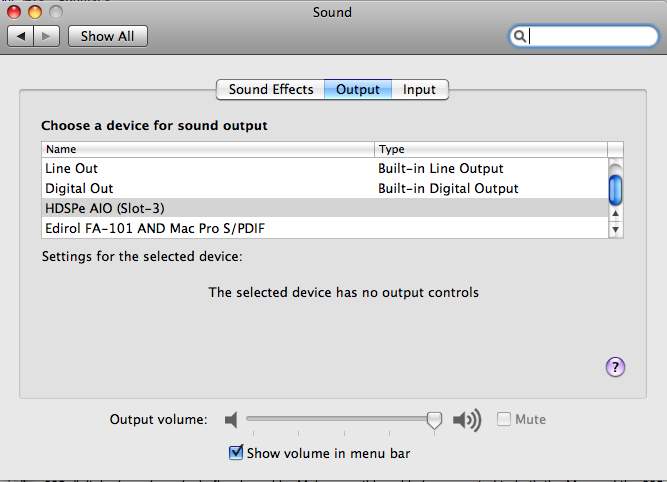
Mac => System Preferences => Sound Make sure that HSDPe AIO (Slot-3) is selected for Output and Input
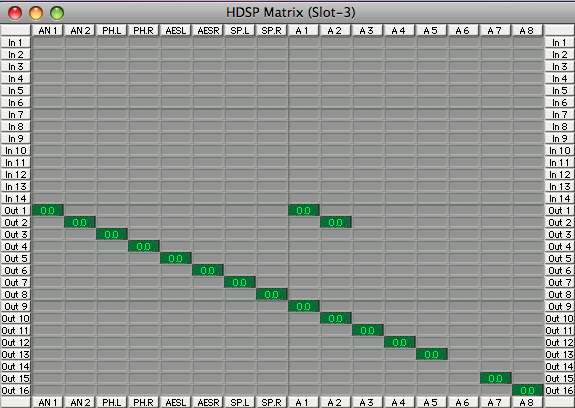
Now open Applications => HDSP Mixer. Click “View” => “Matrix” It should look like this:
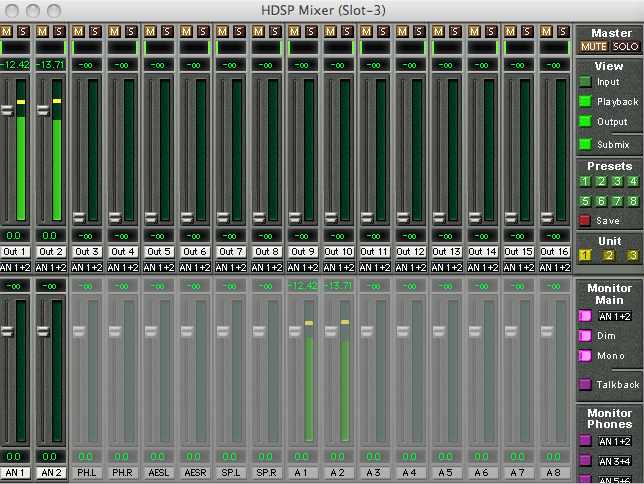
Make certain that A1 and A2 are selected for Out1 and Out2. You should see the meters going now. Sound is 100% going out of the mac now.
If you don’t see any info in the meters, check that the volume of your source program isn’t mute or something. Now raise channels 17 and 18 on the Yamaha, along with the master. Got It? Great. If not, continue...
Check the Mixer:
Now make sure that the settings on the YAMAHAA DM1000 mixer are correct:
Load Scene 05 MAC PRO PLAYBACK.
Select “Input Patch” from the Display Access Area. Make sure the selected tab is “In Patch”. Double check that on the display, the boxes below channels 17 and 18 are routing to S1-1 and S1-2 respectively.
Select “Output Patch” from the Display Access Area. Select the Omni Out tab. Make sure that “Omni 1” and “Omni 2” are selected to “Bus 2” and “Bus 1” Respectively. (Inverted...solves the stereo issue).
Now try selecting Layer 17-32 and raising sliders one and two, you should get sound. If you are still struggling, please find Jay Kadis or Sandy Greenfield to help.
Troubleshooting Visuals
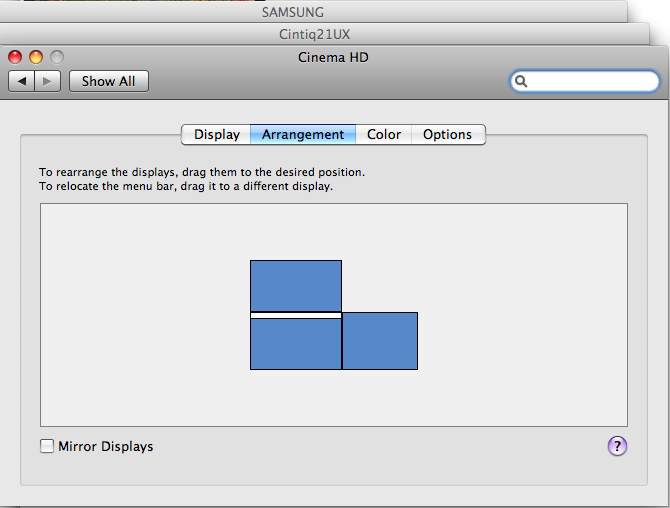
Screens not working? Go to Preferences => Displays. Click “Gather Displays”. You should get three windows together. Click Arrangement. Make sure “Mirror Displays” is deselected.
If you don’t see three Boxes right near each other, click “display” and click “Detect Displays”. This should resolve any issues.
Note: In particular for video editing, the Samsung needs to be calibrated. Select “Color” on the samsung preferences, and make sure that the preset “samsung calibrated” is selected. Alternatively, you can calibrate your own version...try to make it look as close to the Cinema HD display as possible.
