Using Netjack
| Netjack enables computers or laptops to connect to OpenMixer easily with just one ethernet cable. A computer or laptop using the proper version of Netjack will see 24 input and output channels through Jack. |
Netjack under Linux
Using Netjack under LinuxTo connect your Linux laptop to OpenMixer you will need an up to date version of Jack2 compiled with the "netone" netjack driver (see http://www.jackaudio.org/download - 1.9.6 at the time of this writing). You also want to have a current version of Qjackctl (http://qjackctl.sourceforge.net/ - 0.3.6 at the time of this writing) that supports "netone" out of the box.If you have installed Fedora and the Planet CCRMA audio package repository then you should have both (otherwise run "yum install qjackctl jack-audio-connection-kit" from the command line and - if you have the Planet CCRMA repository enabled - you should get the right versions for both). Commands to install them in other distributions would be different (for example, use apt-get in Ubuntu). The following pictures and the description of the procedure was done on a laptop running Fedora 13, other versions of Fedora or other distributions may have slightly different looks for the applications. Connecting your computer to OpenMixerMake sure that you have configured your laptop to use DHCP so it automatically gets an IP address from the OpenMixer computer. Connect your laptop to one of the four ethernet ports in the Listening Room equipment rack (use one of the yellow ethernet cables). Once you are connected you should be able to access the Internet (fire up a browser and test the connection - and make sure you are not connected through wireless only!).Starting JackStart Qjackctl (from the "Applications", "Sound & Video" menu):
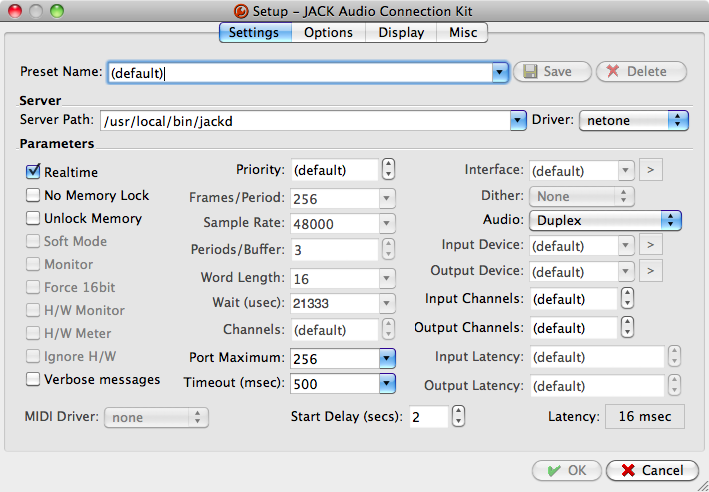
Click on "Setup", change the Driver to "netone" and click "OK":
For netjack to work you need to enable incoming UDP packets on port 3000 in your firewall, so fire up your firewall configuration utility. In Fedora 13 that would be in the "System" -> "Administration" -> "Firewall" menu entry.
This is how the main window of the firewall configuration utility will look after you add the port:
Press "Apply" and firewall should be restarted including your new access rule.
followed immediately by:
If this last part does not appear you are either not connected properly to the OpenMixer ethernet port or your firewall configuration is incorrect.
At this point you can start Jack applications and connect them to the OpenMixer netjack source through Jack. |


Netjack under OSX
Download and install JackOSXDownload and install the version of JackOSX that corresponds to the version of OSX you are running.The most up to date versions are in the JackOSX web site itself. Go to the download page and select the installer that corresponds to your OSX version. You could also go to the Jack Audio Connection Kit download page, and download from there, but versions might be older than the ones in JackOSX.com. Open the downloaded file with the archive utility. It will unpack the download and show you the installer package. Double click on it and install the package. This will add to your computer:
Download and install QjackctlFirst check to see if Qjackctl was already installed, as it is part of the newer versions of JackOSX, if so please skip this step...Qjackctl is a very convenient Jack GUI front end that is the default interface for Jack in Linux. There are binaries in the Ardour web site but not of the latest version (go to http://www.ardour.org). You can download a current version with "netone" driver support from here:
Open the dmg file and drop the Qjackctl application bundle into your Applications folder. Connecting your computer to OpenMixerMake sure that you have configured your laptop to use DHCP so it automatically gets an IP address from the OpenMixer computer. Connect your laptop to one of the four ethernet ports in the Listening Room equipment rack (use one of the yellow ethernet cables). Once you are connected you should be able to access the Internet (fire up a browser and test the connection - and make sure you are not connected through wireless only!).Running Jack through QjackctlQjackctl is a GUI front end for Jack. After starting it you should see its main window:
You will need to configure it before starting Jack! Click on the "Setup" button and change:
Close the "Setup" dialog and click on "Start". If your firewall is running (and this is the first time you run Jack with the "netone" driver) you will be prompted to allow incoming connections from jackdmp:
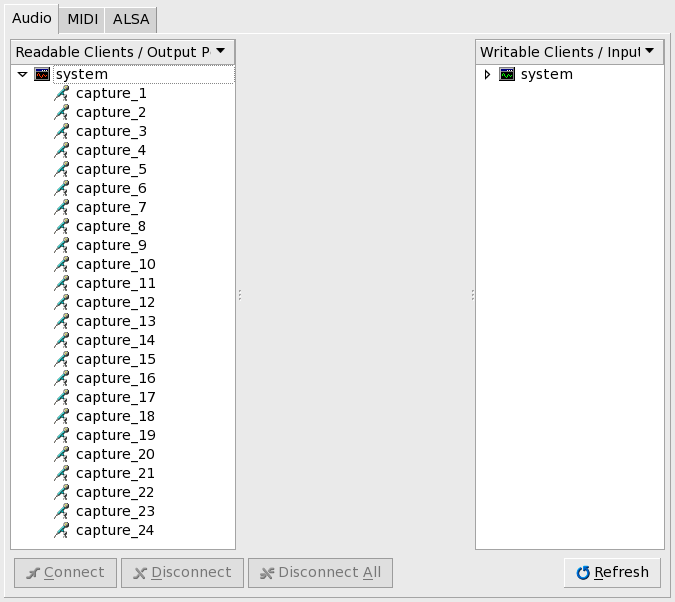
Click on "Allow" and Jackd will finish starting up since it can now connect to the Netjack server running on the OpenMixer computer. If you click on "Messages" you will see that Jack is now running with a period size of 256 frames and it has 24 input and output channels (and 1 MIDI channel as well), which matches the default configuration of the OpenMixer Netjack servers. Click on the "Connect" button to show the connections window:
You can click on each client to show individual channels and you can drag connections from the left pane to the right pane. Very easy. But before you start to connect applications together you have to let your Mac know that it should send Core Audio audio to Jack itself... Setting the number of channels JackRouter will haveStart JackPilot (in the "Applications" "Jack" folder) and open the Preferences panel.
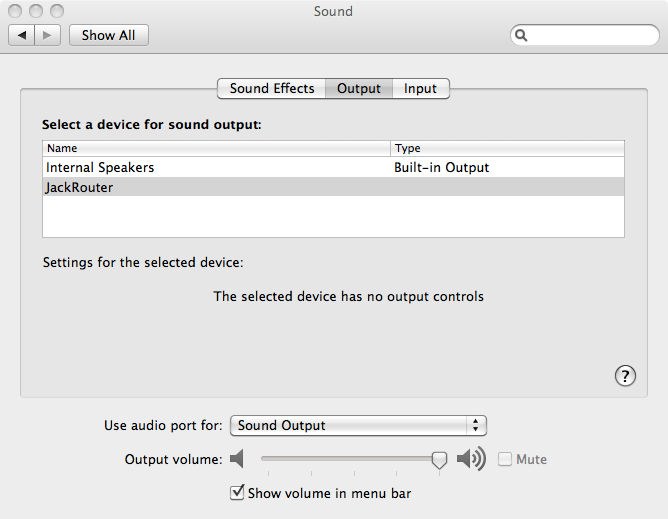
Set the number of channels that Core Audio will see in the "Virtual Input Channels" and "Virtual Output Channels" fields. You will need to modify this if you want to use Core Audio apps with multichannel outputs (more than the default of stereo). You should set "VIrtual Input Channels" and "Virtual Output Channels" to 24. Routing Core Audio to JackNow go to your "System Preferences" and then "Sound" and you will see an entry for "JackRouter" in both the input and output tabs.
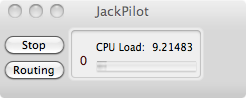
Click on "JackRouter" to send audio from Core Audio OSX programs to Jack. You can do the same for the "Input" tab. Start an OSX program and you should get audio from it through the Netjack connection. Of course you will need to have selected the "netjack" source in OpenMixer and set a default preset for a default routing in OpenMixer to hear sound. Running Jack through JackPilot (optional)JackPilot is included in JackOSX and is a GUI front-end to Jack. NOTE: you can't start Jack with the "netone" driver from JackPilot as it does not yet include support in its GUI for it (use Qjackctl instead or start jackd from a terminal).If you start it with Jack already running you will see its main window. You will see how much CPU Jack is currently using:
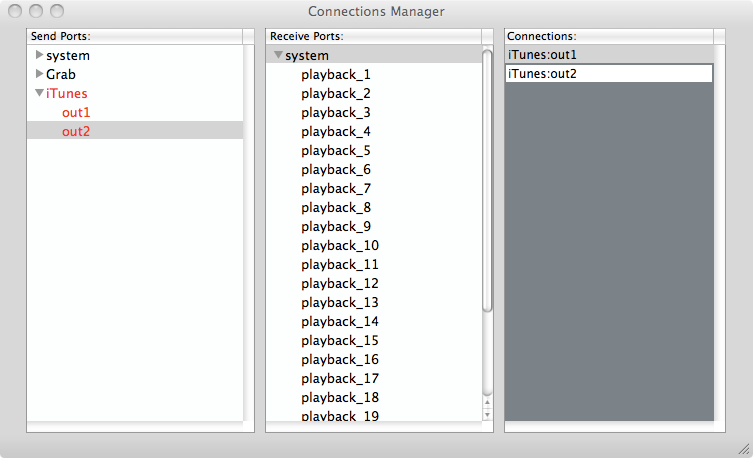
Click on "Routing" and you should see "system" ports for input (Receive) and output (Send) in the "Connections Manager" dialog:
Click on the port to open it up and show the individual channels. Both "system" ports should have 24 channels. In the Jack world "system" ports normally point to your soundcard, in this case they are input / output connections to OpenMixer. Route your channels in the "Routing / Connections Manager" window by clicking on the "Send Port" that corresponds to the application that is generating audio, and then on one of the channels. The select the "system" "Receive Port" and double click on the channel that you want to connect to. You can route any channel from any application to any output channel in the Listening Room. This picture shows a simple stereo connection to the first two channels from Itunes:
|