Haptic Interfaces for Musical Controllers
Jesse Fox, Ongoing Project for Music 220c, Spring 2005
Link to Matt Wright's page on programming an AVR microprocessor under OS X is here.
Link to my page on getting OSC to work in PD under OS X is here.
Abstract:
Haptic Plectrum
The haptic plectrum is the heart of a new musical controller. Through force-feedback and a specially designed physical pick-like interface, the haptic plectrum has the ability to mimic the feeling of various plucked strings. Haptic feedback is provided by an optically encoded servo motor, controlled by an AVR microcontroller that outputs OSC messages via serial port. Further, the haptic plectrum is designed to be small and portable, and integrates easily into performance-friendly form factors. Currently, the haptic plectrum is coupled to a set of ribbon controllers that provide continuous control of virtual string length. All synthesis is done using PD on a Linux computer.
Update, 05/30/05:
As of tonight at midnight, I am finished with the hardware construction. Pic's of the last few steps of assembly:
Everything works very smoothly, and all I had to do was plug the thing in. It worked on the second try (simply had to change one wired connection from the motor to the board- silly mistake on my part), which is pretty amazing in my opinion. At this point, I have a lot of work to do on the software before I will be really satisfied with the instrument, and I might continue to tinker with the pick/motor interface form. But for now, it's complete, and I am pretty happy with how things turned out.
Update, 05/23/05:
I've spent the past week practically living in the Product Realization Lab here at Stanford. The very kind folks there have been helping me learn new construction techniques and teaching me how to use many of the myriad machines they have available for student use. Below are some photos that represent my progress as of tonight:
- lasercamm.jpg- This is a photo of my 1/4"-thick acrylic motor mount being cut by a 100-watt, computer-controlled laser cutter.
- top_plate.jpg- This view of the top plate of my controller is an assembly of various laser-cut acrylic parts (note the motor mount).
- workbench.jpg- Things tend to get chaotic around the workbench in the max lab.
- neck.jpg- A view of the 'neck' of my instrument- this is the bottom. The acrylic piece running along the length of the neck is a cover for a channel housing a group of power wires for my ribbon controllers.
- body_primer.jpg- This is the frame for the body of my instrument, primered and ready for paint.
Things are moving along nicely. I have been working almost non-stop on this project all week, and though I am very close to completion, I am leaving for NIME tomorrow, and won't be able to continue work for another week, leaving me only two nights to finish (!). I can do it though. I'm almost there- the biggest thing to do at this point is to construct a set of op-amp circuits in order to bias and scale the voltage I'm getting off of my ribbon controllers to maximize sensitivity and optimize my \delta V running into the a2d converters on the AVR microprocessor. Of course, once the controller is done, I can begin experimenting with various synthesis and mapping paradigms.
Though close, I am still a ways away from where I want to be with this project. I'm getting really close, but then this is still just the first prototype. Things are looking good. Note: apologies for the relative incoherence of this update- it's very late and I've been awake for quite some time now.
Update, 05/16/05:
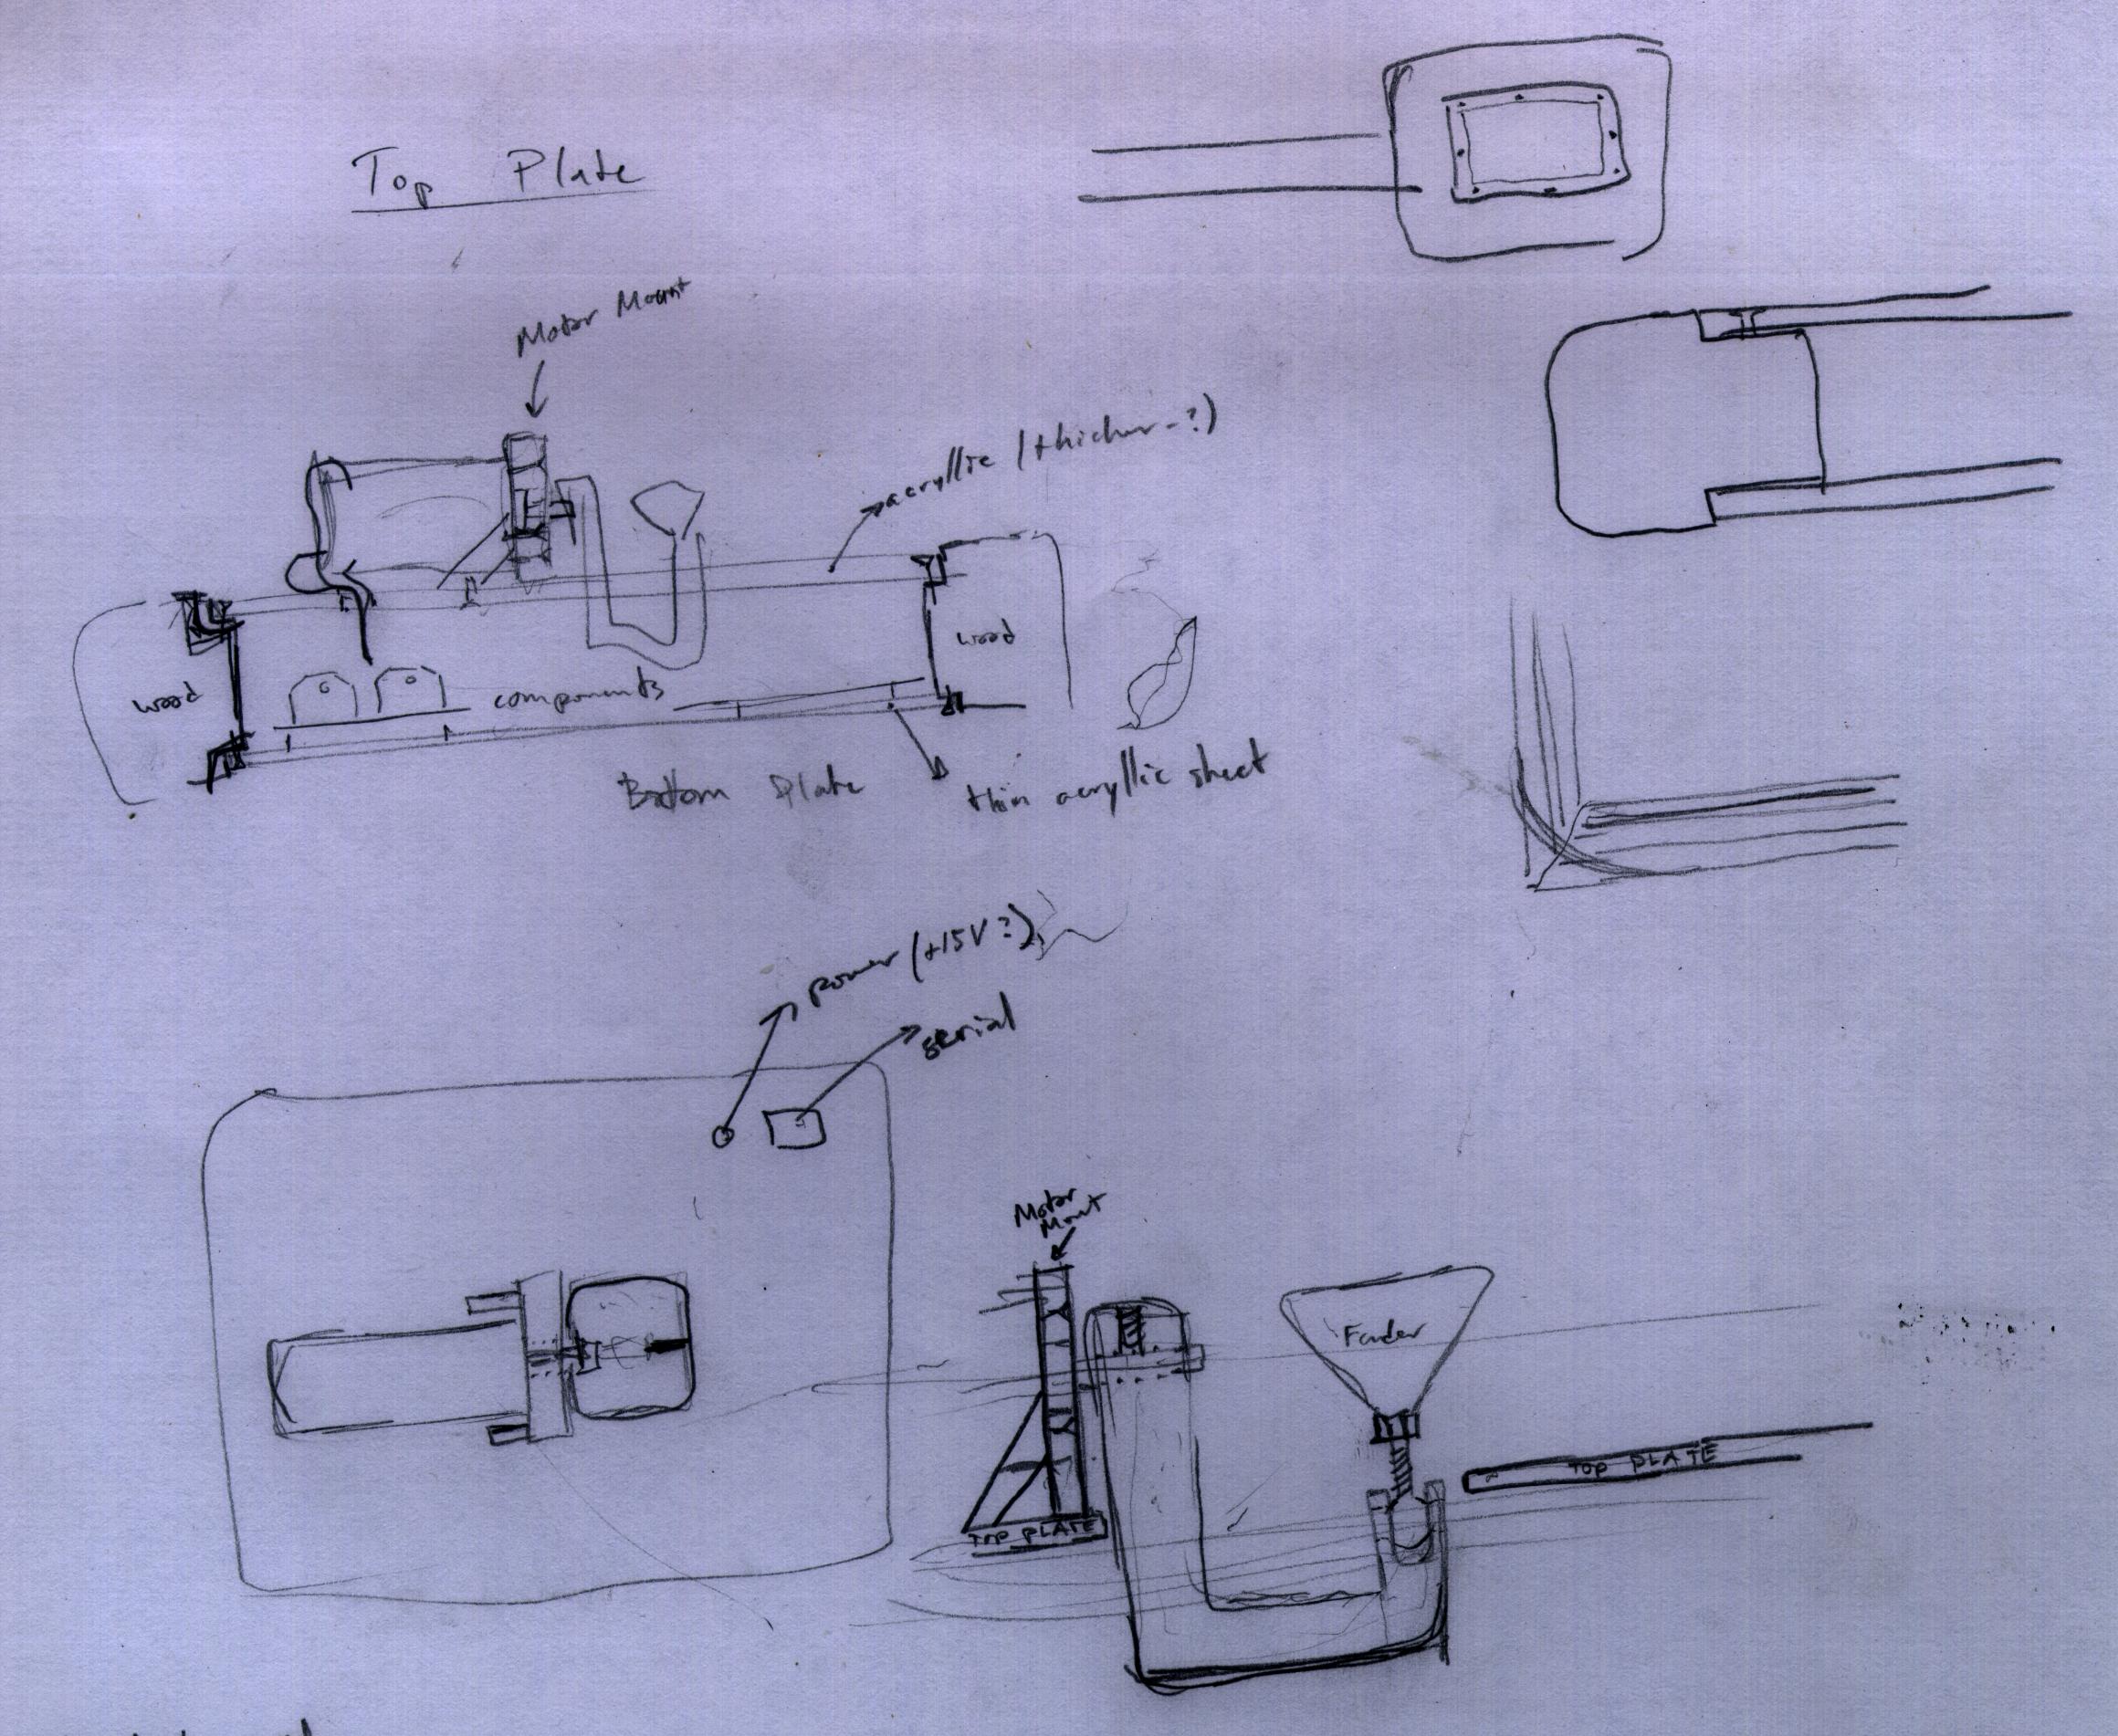
This is almost it! I want to have my controller built a week from today. No problem. Here are a few sketches of what the finished project might look like:
I have plans to use the LaserCamm at the PRL to cut acrylic pieces for my motor mount, top and bottom plates, and various smaller parts for the neck of the instrument. Also, I think I'll construct my new pick interface (with new, improved geometry! See notebook scans for details) from either ABS or Delrin plastic, which make good mechanisms for the threaded ball joint that I've been using for the pick itself. The neck and outer body of the instrument will be made of wood, possibly pine or even layered particle board, so that I can easily sand and shape the body into smooth, pleasing shapes. While the motor sits on top of the body itself, all the electronics will live inside, as will a battery (though an external plug for power will still be available). I think I am going to use four ribbons made of half-inch magnetic tape, and they'll be about a foot and a half long each.
Another picture for your viewing pleasure: as promised, here is a photo of a couple of the testbed pick interfaces I made. Note that the one on the left pivots on a nylon universal joint, and the one on the right is an example of the threaded ball-joint that I will use for the final project.

Update, 05/13/05:
Various pick interfaces have been completed. I hope to have photos up soon, but after testing both a ball-joint style pick interface and a small universal joint interface, it seems clear that the ball joint is favorable because it can freely rotate around its center axis, whereas a universal joint cannot do so without an extra pivot.
Also, other ribbon controllers have been built, including one using a teflon-based backing and foam tape supports. The original design (as seen below) is still the most consistently successful iteration, in that its spring mechanism (which is simply atrributable to tension) is predictable and reliable. I think I will probably settle on using an updated version of the original design for the final controller, since it is a bit simpler and more pleasing to use, in my experience.
Much thought and time has gone into optimizing the AVR program in order to get things running as smoothly and quickly as possible. It is very important to have rapid update times with a servo motor, and I am trying to optimize my code and take advantage of the AVR's capabilities as best as I can in order to give the user the best feel possible.
I still have a ways to go in terms of polishing up my code, but the main algorithm is already in place. I have a little less than two weeks until NIME, and I'd like to have a mostly finished controller to bring up to Vancouver. My priorities are: optimize and polish code, complete pick mechanism, build instrument body. I figure that as long as I have the controller done by NIME, I can spend a bit of time afterwards working on various synthesis paradigms in order to make the instrument fun and playable.
Update, 05/02/05:
I built my first prototype of a ribbon controller. Here are a few pictures:


I mounted a strip of copper tape to a fiber board that serves as a rigid base. The ribbon itself is simply a strip of 1/2" magnetic tape, and the matte black "backside" of the tape is the side that is conductive (so that static charges don't build up when the tape is running through rollers and tape heads and things like that on tape recorder/player). I've set up a voltage of +5 Volts across the tape (from end to end), and by virtue of the material of the tape, there is a continuously varying resistance along the tape itself. My piece of tape is roughly one foot long, and there is about 1.5 MOhm resistance from end to end. The tape is backed with masking tape for integrity and is mounted under tension about half an inch above the copper tape, and a lead from the copper tape is my Vout that heads straight into an A/D converter on my AVRmini proto-board.
I have also constructed the first prototype of my pick mechanism (thanks to Jon at the PRL), and it consists of an ABS connecting rod with a threaded ball end that snaps into place at the end of the plastic rod. Now, I can thread various pick forms onto the ball end for further experiments in feel. I hope to post a photo soon- stay tuned.
Update, 04/23/05:
First, I have compiled a web page that outlines the procedure for getting OSC working in PD under OS X. The page, complete with software and instructions, can be found here.
Second, I have a working prototype of my haptic plectrum up and running, and the first incarnation of the prototype was demo'd in class on 4/19/05. I got a simple haptic pluck program running on the AVRmini development board. In addition, I am using a motor driver (info here) and a Reliance Electric motor with encoder (info here). The whole setup is standard lab fare for Music 250a, taught here at CCRMA by Bill Verplank (see link to his personal web page below). Directly below is a picture of my prototyping setup:

On the left, you can see the motor I'm using, with a Delrin stick attached to the motor shaft. This is what the user holds and moves in order to "pluck", and you can see a small force sensing resistor on top of the stick. This design (including the acrylic motor mount) was made by Bill Verplank. My final design for the actual physical plectrum interface might look something like the drawing at the bottom of this page:

I would like to make it out of aluminum, with a freely articulating ball joint (or something similar) between the pick-shaped object and the shaft that is directly attached to the motor shaft. I hope to make the first prototype of this soon. Also, notice that there are two FSRs incorporated into this design: one on either side of the 'pick'. I am thinking of using these as gauges for computing amplitude of the sound output- the harder you press or squeeze the 'pick', the louder the output.
In order to simulate a plucking sensation using a single servo motor, I need to compute a force profile as a function of motor shaft position. In this case, such a profile (or "landscape", as Bill calls them) for simulating the pluck of a string looks like this:

In these drawings, W is a parameter analogous to motor shaft position as read by the optical encoder on the Reliance servo motor, and D stands for "duty", which feels like a force pushing back on you. In the most basic profile, the motor starts pushing back on you once the encoder notices that you have passed an arbitrary origin. Once the force is engaged, the amount of force pushing back varies linearly and in proportion to how far you push the Delrin stick. Once you reach a certain threshold (defined both in terms of D and W, thus letting you specify the slope of the force profile), the duty drops to zero, and it feels like you've plucked a string. As shown in my drawing, you can vary the slope itself, make the slope non-linear (though it seems to feel pretty much the same- I will try to demo this for the next class meeting), and overlap the positive and negative force profiles in an effort to make the feeling more realistic. The next step is implementing several plucking profiles next to each other to simulate a multi-stringed instrument.
So far, I have my single-pluck set to output OSC messages that I interpret in PD, and just as a simple demo, I have a haptic pluck running a Karplus-Strong string physical model within PD for demonstration purposes.
Update, 04/18/05: Still working on getting my OS X laptop to communicate with the AVRmini proto-board. A very recent development (as of late last night) shows promise, from Scott Wilson.
Today, I will demo my first experiment with a haptic pluck using an AVR microcontroller, a single motor (one degree of freedom), OSC and PD.
Some useful links:
- Perry Cook's page of controllers.
- Haptics-e, an electronic journal of haptics research.
- The McGill Haptics Laboratory.
- Northwestern has a page for the haptics community.
- The MIT Touch Lab.
- Sensable Technologies (makers of the phantom device) has a page.
- A FAQ hosted by the Unversity of Washington, here.
- Margaret Minsky (MIT) has a good collection of haptics links here.
CCRMA web pages on haptic feedback and its applications towards musical controllers:
- Bill Verplank's web site.
- Lonny Chu, CCRMA grad, still has a page here.
- Charles Nichols, another ex-CCRMA-lite, has a web site here, containing information about his "vBow".
- Sile O'Modhrain's page at CCRMA.
 Page by Jesse Fox. Email: jrobfox(at)ccrma(dot)stanford(dot)edu.